

A Spring Exterior Makeover is one of the best ways to refresh your home after winter. Spring has a way of making everything feel lighter, brighter and full of possibility. The garden starts to wake up, outdoor spaces become more inviting, and suddenly the outside of the home begins to matter again. After months of winter cold, rain, moisture and general exposure, many exterior surfaces begin to show the season they have just endured.
Walls may look tired. Paint may start lifting. Metal gates may show early signs of rust. Timber may appear dry, cracked or weather-worn. Boundary walls, window frames, fascias and previously repaired areas may all begin to reveal small problems that were easy to ignore during winter.
That is why spring is one of the best times to give your home a proper exterior health check.
A fresh coat of paint can completely transform the look and feel of a property. It can brighten a façade, improve curb appeal and give the home a renewed sense of care. But the secret to a beautiful and long-lasting Spring Exterior Makeover does not begin with the colour chart. It begins with the surface.
Before you choose your new colour palette, take a slow walk around your property. Look closely at the walls, gates, trims, timber, metalwork and garden walls. A successful repaint is not simply about applying paint; it is about preparing each surface so the paint system has a clean, dry, stable and sound foundation to perform as intended.
Start Your Spring Exterior Makeover With a Full Exterior Inspection
The first step in any exterior repainting project is to inspect the entire outside of the home, not just the main walls. Different surfaces age in different ways, and each one may need a specific type of preparation before it can be painted.
Check your exterior plaster and masonry walls, boundary and garden walls, window sills, door and window frames, gates, fencing, fascias, timber trims, metalwork and any areas that have been repaired before. These surfaces are constantly exposed to sun, rain, dust, water run-off and movement, so even small defects can develop into bigger problems if they are painted over without being properly treated.
Look for hairline cracks, larger cracks, peeling or bubbling paint, exposed plaster, chalky or powdery surfaces, damp patches, water staining, fungal or algae growth, rust, splintered timber and rough weathered areas.
Pay special attention to walls that receive the most sun, surfaces that stay damp for longer, areas under gutters or downpipes, and corners where water tends to collect. These are often the places where paint failure, fungal growth or surface breakdown appears first.
A good inspection helps you understand what your home needs before you begin. It also helps you avoid one of the most common repainting mistakes: applying a beautiful new finish over an unstable surface.
Clean Before You Repair or Paint
Before any filler, primer or paint is applied, the surface must be clean. Paint needs good contact with the surface underneath it, and dirt, dust, chalk, grease, loose material or old biological growth can interfere with adhesion.
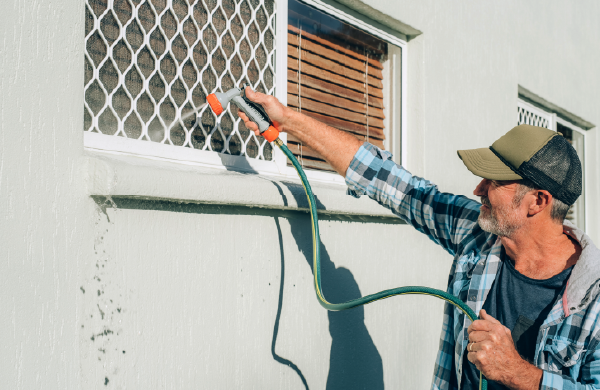
Exterior walls should be cleaned thoroughly to remove surface contamination. If the walls are washed, allow them to dry completely before moving on to the next stage. Painting or priming over a damp surface can affect adhesion and may trap moisture behind the coating.
Cleaning may feel like the least exciting part of your Spring Exterior Makeover, but it is one of the most important. A clean surface gives every product that follows a better chance of performing properly.
What About Fungal and Algae Growth?
Green, black or dark biological staining should never be treated as a simple colour problem. Fungal and algae growth must be cleaned and treated before repainting, otherwise it may continue to show through or reappear.
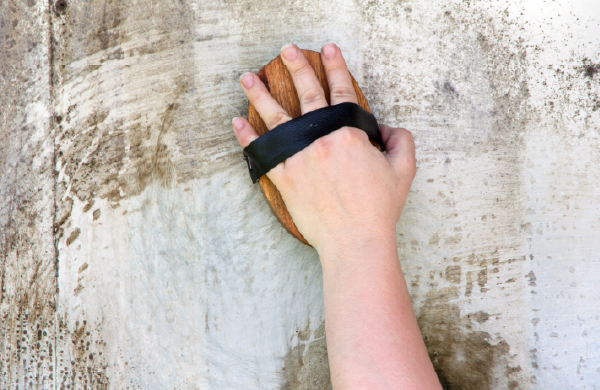
Apply Fungal Wash generously to the affected areas and allow it to soak into the surface. After approximately 12 hours, scrub the surface thoroughly using plenty of clean water, then allow it to dry completely. If fungal or algae growth is still visible, repeat the treatment before continuing with repairs, primers or topcoats. This step is especially important on shaded walls, damp areas, boundary walls, garden-facing elevations and surfaces that receive limited sunlight.
Repair Cracks Before Your Spring Exterior Makeover
A crack is more than a line in the wall. It is a weakness in the surface, and painting over it will not make it disappear permanently.
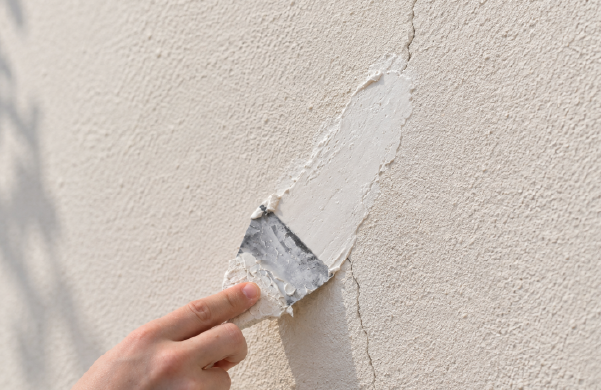
Small, non-structural cracks in plaster and cement walls can be repaired with Acrylic Crack Filler. It is suitable for vertical and horizontal cracks up to a maximum of 3 mm wide.
Apply the filler using a spatula, scraper or trowel. Allow approximately 24 hours drying time per millimetre of filler thickness, then sand the repaired area smooth and remove all dust before priming and painting.
Cracks larger than 3 mm, cracks that reopen repeatedly or cracks associated with structural movement should not simply be filled again and again. These areas should be properly assessed so the cause of the movement can be understood before repainting.
Good crack repair helps create a smoother finish and reduces the risk of visible defects spoiling the final result.
Do Not Paint Over Peeling or Flaking Paint
Loose paint cannot be rescued by another coat of paint. If the old coating is peeling, bubbling or flaking, the new coating will only be as secure as the weak layer underneath it.
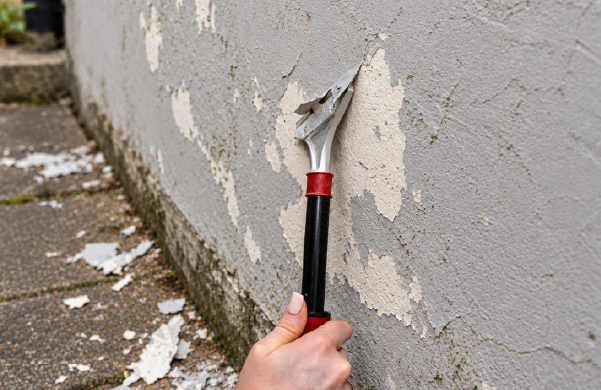
Remove all loose and flaking paint by scraping and sanding. Where the existing coating has failed extensively, the defective coating should be removed rather than covered. The remaining surface must be clean, dry and sound before repairs and priming begin.
This is one of the golden rules of repainting:
Your new paint is only as strong as the surface beneath it.
Taking the time to remove failed paint may require extra effort, but it protects the final finish and helps the new paint system bond properly.
Check for Powdery or Chalky Walls
Run your hand across the wall. If a powdery residue comes away onto your fingers, the surface may be chalky, friable or weathered.
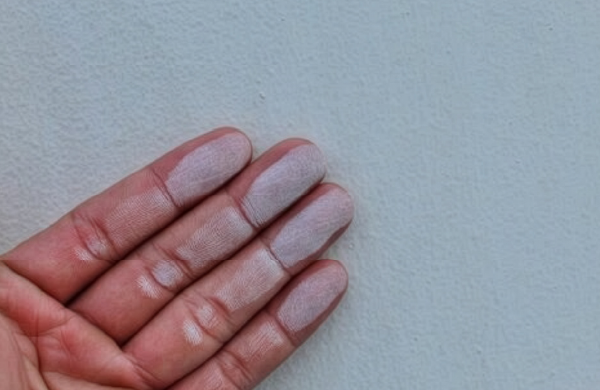
This powdery layer can prevent proper adhesion if it is not stabilised before painting. Simply applying paint over a loose or dusty surface may lead to poor bonding, uneven absorption or premature coating failure.
Bonding Liquid is designed to penetrate and stabilise powdery, friable and very porous surfaces. Allow approximately 16–24 hours drying time, and overcoat Bonding Liquid within 72 hours.
This helps create a more stable base for the coating system that follows.
Prime Bare and Repaired Masonry
Bare plaster, exposed masonry and repaired areas should not be treated the same way as previously painted sound surfaces. Once exterior plaster, concrete or masonry has been cleaned and repaired, the correct primer helps create a suitable base for the final coating.
Depending on the surface condition, the system may include:
Water-Based Plaster Primer – allow approximately 4–6 hours drying time.
Pigmented Plaster Primer – allow approximately 16–24 hours drying time.
Bonding Liquid – for suitable powdery, friable or very porous surfaces; allow approximately 16–24 hours drying time and overcoat within 72 hours.
Correct priming is particularly important on repairs, bare plaster, porous areas and weathered surfaces. It helps manage absorption, supports adhesion and contributes to a more consistent final appearance.
Choose the Right Exterior Wall Paint
Once the surface has been inspected, cleaned, repaired and primed, the creative part of your Spring Exterior Makeover begins: choosing the colour and finish.
This is where the personality of the home can come through. A fresh white can make a façade feel crisp and timeless. Warm neutrals can soften the exterior. Greys can create a contemporary look. Earthy tones can connect beautifully with garden spaces and natural surroundings.
Universal Paints offers several exterior options depending on the finish and performance required.
Allcote Pure Acrylic
Allcote is a premium, low-odour, water-based pure acrylic long-life coating with a sophisticated suede finish.
It has a 10-year life expectancy and is suitable for correctly prepared interior and exterior surfaces. Its pure acrylic formulation provides durability, washability, excellent adhesion, UV resistance and low VOC benefits.
Apply two coats, allowing approximately 4–6 hours drying time between coats. When applying by brush or roller, do not thin the product. If spraying, the first coat may be thinned by approximately 10% where required.
Allcote is a strong choice for homeowners who want a premium exterior finish with a refined appearance and long-term durability.
Semitex Textured Paint
For a more textured exterior look, Semitex provides a finely textured finish containing mica and silica.
It is a water-based pure acrylic coating with a 10-year life expectancy and offers excellent flexibility, adhesion, elasticity, UV resistance, durability, low VOC benefits and coverage of hairline cracks.
Semitex is particularly useful for boundary walls, feature walls and exterior surfaces where a textured finish can enhance the overall look. It helps create depth and character, especially on large wall areas that may benefit from a more tactile surface appearance.
Apply two coats, allowing approximately 4–6 hours drying time between coats. Do not thin.
Although Semitex can assist with hairline cracks, visible cracks and damaged areas should still be properly prepared before painting.
Premium Acrylic Matt
For homeowners who prefer a smooth, clean and contemporary matt finish, Premium Acrylic Matt is a low-odour, water-based pure acrylic long-life coating.
It has a 10-year life expectancy and is suitable for correctly prepared interior and exterior surfaces. Benefits include a smooth matt finish, pure acrylic formulation, excellent adhesion, durability, washability, UV resistance and low VOC performance.
Apply by brush or roller in two coats, allowing approximately 4–6 hours drying time between coats. Do not thin.
Premium Acrylic Matt is ideal for larger exterior wall areas where a modern, understated finish is preferred.
Maintain a Wet Edge When Painting Large Walls
Good application technique can make a noticeable difference to the final result.
When painting a large exterior wall, work from one natural stopping point to another, such as from corner to corner. Try to maintain a wet edge as you work rather than stopping halfway across a wall and returning later.
This helps prevent lap marks, patchiness and visible changes in colour or texture. It is especially important when using darker colours, textured coatings or finishes with a distinctive sheen.
A beautiful finish is not only about the product you choose; it is also about how carefully it is applied.
Give Metal Gates, Frames and Fencing Some Attention
A Spring Exterior Makeover should not stop at the walls. Metal gates, fencing, burglar bars, gutters, railings and metal window frames also deserve attention.
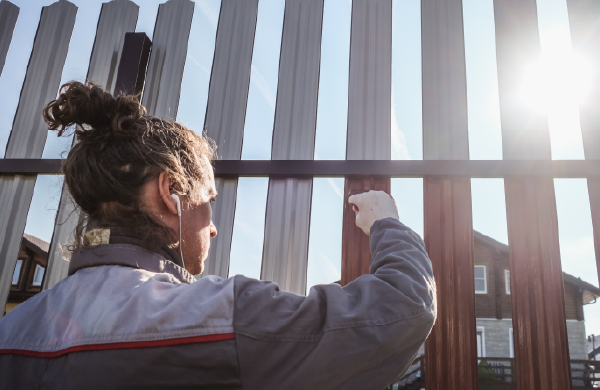
Check metalwork for rust, peeling paint, flaking coatings, scratches, exposed metal and general weathering. Small rust spots or exposed areas can spread if they are ignored, especially on exterior metal constantly exposed to rain and moisture.
Preparation depends on whether the surface is galvanised steel or mild steel.
New Galvanised Steel
New galvanised steel often has oils or manufacturing residues that can interfere with paint adhesion.
Clean and degrease the surface with Zinc Cleaner. Repeat the cleaning process until the surface is water-break free, then rinse thoroughly and allow it to dry.
Once dry, apply Galvanised Primer and allow approximately 4–6 hours drying time before continuing with the coating system.
Previously Painted Metal
Previously painted metal should be inspected carefully. Remove loose and flaking paint and sand the remaining coating to create a sound surface.
Rusted areas should be cleaned back to bright metal before priming.
For mild steel, prepared areas can be spot primed with Galvanised Primer or Red Oxide Quick-Dry Primer, allowing approximately 4–6 hours drying time.
For galvanised steel, use Galvanised Primer and allow approximately 4–6 hours drying time.
Finish Metalwork With a Hardwearing Enamel
Once metal surfaces have been correctly prepared and primed, choose a suitable enamel for the finishing coats.
High Gloss Enamel
High Gloss Enamel provides a durable, washable high-gloss finish for suitable metal and timber surfaces.
The glossy finish works well on gates, fencing, metal frames, railings and exterior trim where a hardwearing, easy-to-clean surface is required.
Apply two coats, allowing approximately 16–24 hours drying time between coats.
Quick Dry Enamel
Where faster turnaround is important, Quick Dry Enamel provides a hardwearing enamel option with a shorter drying time.
This can be useful for gates, doors and other frequently used exterior items where you want to complete the project sooner and reduce downtime.
Do Not Forget Exterior Timber
Timber adds warmth and character to a home, but it also needs regular care. Wooden gates, window frames, sills, fascias and fencing are all exposed to harsh outdoor conditions.
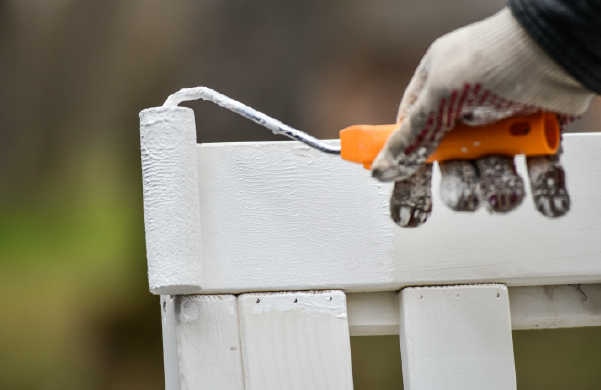
Sun and rain can cause older coatings to fade, crack, peel or flake. Untreated or weathered timber can become rough, porous and splintered.
Start by removing loose coatings and sanding the timber until the surface is clean, smooth and stable. Sand in the direction of the wood grain and remove all sanding dust before priming.
Careful sanding and preparation help restore the surface and create a better base for the finishing coats.
Prime Bare Timber With Pinkwood Primer
Bare or prepared timber can be primed with Pinkwood Primer.
The primer penetrates and nourishes porous timber while preparing it for the finishing coats and helping reduce excessive absorption into the wood.
Apply one coat and allow approximately 16–24 hours drying time before continuing.
Previously painted timber should have loose and flaking coatings removed and the remaining paint sanded. Bare and repaired areas can then be spot primed with Pinkwood Primer before applying the finishing coats.
Finish Timber With a Hardwearing Enamel
Once timber surfaces have been correctly prepared and primed, choose a suitable enamel for the finishing coats.
High Gloss Enamel
High Gloss Enamel provides a durable, washable high-gloss finish for suitable timber surfaces.
The glossy finish works well on timber gates, fencing, railings and exterior trim where a hardwearing, easy-to-clean surface is required.
Apply two coats, allowing approximately 16–24 hours drying time between coats.
Eggshell Enamel
Eggshell Enamel is a durable, washable alkyd-based coating with a smooth, semi-matt silky finish for suitable timber surfaces.
It offers excellent adhesion and scratch resistance, making it ideal for timber surfaces where a softer sheen is preferred.
Apply two coats, allowing approximately 16–24 hours drying time between coats.
Choose the Right Weather for Your Spring Exterior Makeover
Spring usually offers excellent painting conditions, but the weather still matters.
Avoid exterior painting when rain is expected, the surface is wet, heavy mist or condensation is likely, or conditions are particularly cold or humid.
Cold, damp or humid weather can extend drying and curing times. Also remember that dry to the touch does not mean fully cured. Always allow the recommended drying time between cleaning, repair, priming and painting stages.
Choosing the right day to paint helps the coating dry correctly and gives the finished surface the best chance of long-term performance.
Give Your Home the Right Start This Spring
A Spring Exterior Makeover should never be rushed into a simple process of: Choose colour → Paint.
A better approach is: Inspect → Clean → Treat fungal growth → Repair cracks → Remove loose paint → Stabilise powdery surfaces → Prime bare and repaired areas → Prepare metal and timber correctly → Apply the right finishing system.
Every part of the home’s exterior tells a different story after winter. A plaster wall, galvanised gate, timber fascia and boundary wall may all need different preparation before they are ready for paint. The key is to understand the surface, assess its condition and choose the correct Universal Paints preparation and finishing products for the job.
Taking the time to repair winter damage before repainting gives your new exterior coating the clean, sound and stable foundation it needs. The result is not only a fresher-looking home, but a finish that performs better, lasts longer and gives your property the renewed curb appeal it deserves.
This spring, do more than repaint. Restore, refresh and protect your home from the surface up. Visit your nearest Universal Paints Direct Outlet for advice on the correct preparation products, primers, exterior coatings and colours for your spring exterior makeover.
